Any expert in electrical services knows that you can never have too many electrical outlets in your home. We have so many smart devices that need to be plugged in; so many homeowners want to learn how to wire an outlet from an existing one. This is especially the case if you live in an older home – you typically get one, maximum two outlets per room.
You want to do a proper job if you try electrical plug wiring: it must be safe to use and you should not leave any telltale signs of your work on the wall. Thus, in this article, we will offer details on adding electrical outlet and wiring it properly in your home.

How to Install Outlets: Materials You Need and a Few Considerations
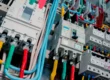
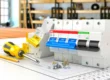
Let us start by telling you that you must be careful how to add an electrical outlet from an existing outlet. One of the things an electrical contractor will warn you against is wiring multiple outlets in series. This means that when one outlet goes out, so do the others. Thus, for residential homes, the safest and best option is to connect each outlet in parallel (you can find examples of a parallel electric diagram online and download it for reference).
Secondly, these are the tools and materials you will need to add an electrical outlet in a room:
- Pencil
- Razor knife
- Drywall saw and drill
- Putty knife
- Non-contact voltage tester
- Level
- Measuring tape
- Fish tame
- 12-2 NM (Romex)
- Drywall screw
When you purchase a new electrical outlet, the package does not contain wall plates, so you should buy them separately.
Now that you have everything you need, let us show you how to install outlets.
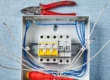
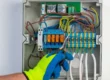
Turn Off Power and Test the Circuit
Before you perform any electrical plug wiring, go to the main panel and turn off power to the circuit you will be working on. Do not start the work before you test the circuit with the non-contact voltage tester to make sure that the power is, indeed, disconnected.
Remove the Base Trim
Take the razor knife and break loose any paint overlapping the margin between the wall and the trim. Next, use the putty knife to loosen the trim and insert a flat bar to pull it away. Keep the trim, as you will reattach it after adding electrical outlet.
Cut Drywall and Drill the Studs
The next step in electrical outlet wiring is starting to cut away the drywall to expose the area where you will install the plug. Use the drywall saw carefully – you don’t want to cut too deep inside the wall and risk damaging a wire. Save the piece of drywall, as you will replace it when you are finished with electrical outlet wiring.
Next, pick up the drill and add a ¾” paddle bit to drill holes in the center of the 2x4s and just above the plate. You should do this from the current outlet in the room and to the place where you want to install a new electrical outlet.
Add the Wire and Feed to the Box
Get the 12-2NM (Romex) and pass it through the holes you made with the drill. Wire it with the existing size 12 to create the circuit and leave some slack at the end – you may need to make adjustments. Remove the locknut, but keep it because you will need it, as we will explain in this guide on how to wire an electrical outlet.
Next, take the knockout out of the bottom of the existing box. Pass the fish tape through the hole until you can see it in the opening below. Attach the Romex to it using electrical tape and pull it through the hole. Now you will need the lock nut – reattach it and secure it with a tap on a screwdriver.
Mark the Place for Electrical Outlet
Now, you will use the tape measure and get the exact size of the top of the existing outlet. Mark the same length with a pencil on the wall for the new electrical outlet. Make sure the new plug will be parallel with the existing one by using the level.
Install the Cut-In Box and Wire It
Take the drywall saw again to cut the drywall and then take out the bottom knockout of the cut-in box. Install the box and tighten the side straps. Next, pass a fish tape through the hole until you can see it below, use electrical tape to attach the Romex, and pull it through the hole. Secure the cut-in box with the locknut.
Clean Up and Connect the New Outlet
We are near the end of the guide on how to install outlets. At this step, you will reattach the piece of drywall and the trim. You can now connect the electrical outlet.
You will remove the protective coating from the Romex and then the coating of the black and white wires for a length of about ¾ inch. Loop them in a semicircle and wrap the black wire around the brass-colored screw in a clockwise movement. Do the same for the white wire, but around the silver-colored screw. Next, you will wrap the exposed copper wire around the green screw. Tuck in the loose ends and attach the wall plate.
Test the Electrical Outlet
Finally, you can switch on the power to the circuit and test the newly installed outlet with the electrical tester. If it works, it means that now you know how to add an outlet to any room in your house.
Do You Need Help with Electrical Outlet Wiring? We Can Help!
At McCarrick Electric, we know that not all DIY projects turn out right. This is why we are here to assist you with adding electrical outlet and any other electrical works you need at home.
We can install, connect, and fix any kind of electrical outlet and other wiring devices in our location in Commerce City, CO and in the service area:
- Aurora
- Brighton
- Denver
- Highlands Ranch
- Littleton
- Parke
- Thornton
- Westminster
Call us now: 720-434-3960!